Prepare your own mod (such as the basic, empty mod example on this section) or reuse startermod_basic or startermod_items for this example.
Make sure to rename your stonehearth.smod to stonehearth.zip, and unzip it correctly so that it still works and we can take a look at the files, before proceeding.
The standard procedure to add a new item is:
- Find a similar item than the one you want to create inside the stonehearth mod (or another mod).
- Copy the files for that entity into your mod folder.
- Modify the names and content of your copied JSON files.
- Add the alias of the item to your mod's manifest.
- Review all the paths and aliases within your files to make sure they point to existing files.
- Test your mod in the game to make sure the item looks and behaves correctly.
For example, to add a new item to the startermod_basic mod, those steps would work like the following:
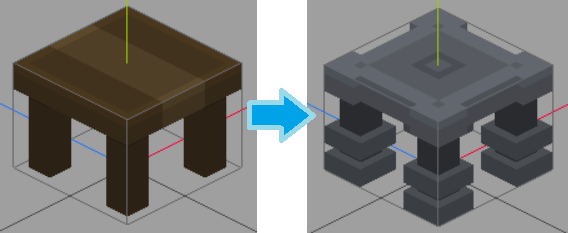
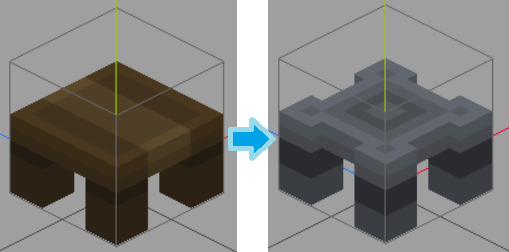
Let's say we want to add a new table with roughly the same size as the "table for one" from the stonehearth mod.
All the entities from the game (except for workbenches, job uniforms and a couple more things) reside inside the stonehearth/entities folder.
For convenience, modders recreate the structure of the stonehearth directories, so that it's easier for them to find files later, but it is not required. You could have all the files of your mod at the same level than the manifest.json file, or inside just one folder, but that's bad practice for when the mod grows bigger.
The table for one files are inside
stonehearth/entities/furniture/table_for_one. Create the entities/furniture subfolders if you don't have them inside your mod's folder. Then, copy the table_for_one folder from the stonehearth mod and paste it into the furniture folder from your mod.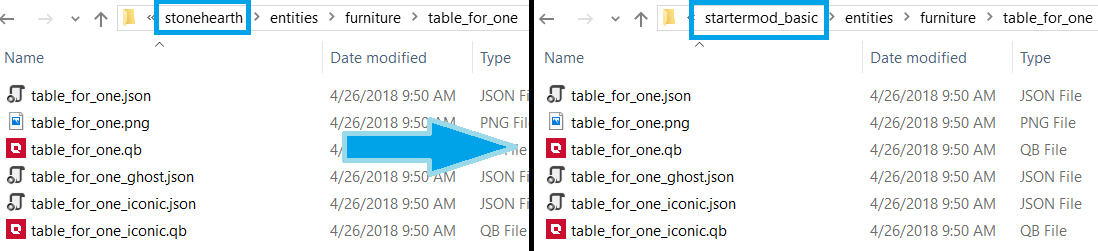
Rename the table_for_one folder to the name of the entity you want to add. To avoid typos and troubles with paths, use only lowercase letters, numbers and underscores, both for folders and for naming files. In this case let's rename the folder to something like "custom_table".
 Now for the files. Rename the files replacing "table_for_one" with "custom_table".
 Then, we'd open the QB files in a voxel editor, change the model to our liking, and re-export it to a QB file with the corresponding name. More instructions on that in the art section of the guide. Don't forget to take a screenshot of the model too, to replace the copied icon.
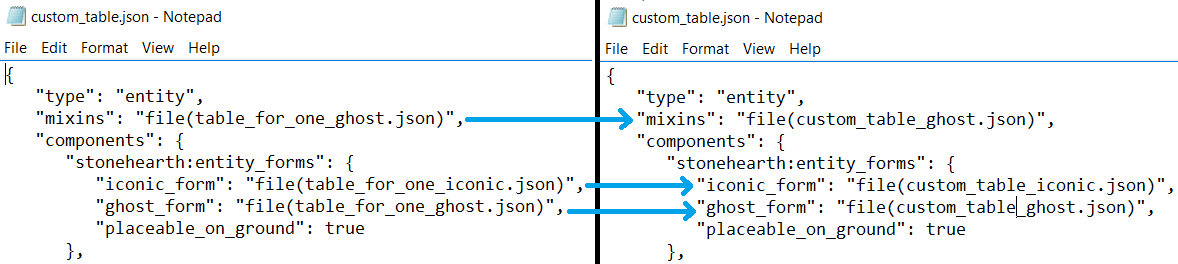
 Now we have to open each JSON file and make sure everything is correct. Open custom_table.json.
Replace all text where it says table_for_one with custom_table, so that the paths point to our files.
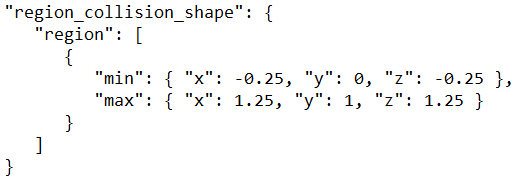
 Adjust the region_collision_shape values if needed (more info here).
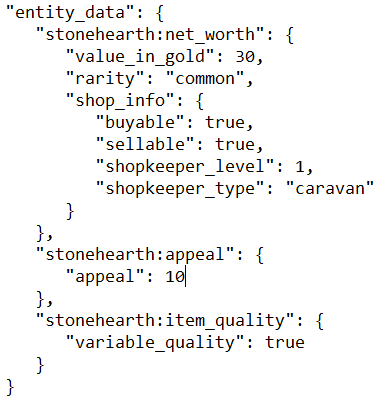
 Modify the entity_data as you want. In this case, we'll increase the value in gold and appeal.
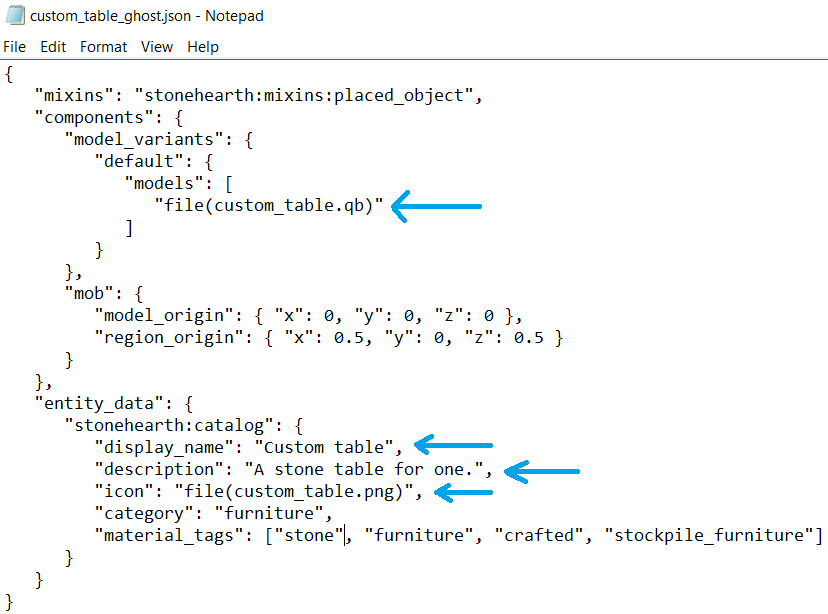
 Next, open the custom_table_ghost.json file. Again, change the table_for_one to custom_table and adjust the model_origin and region_origin if needed.
In the entity_data, change the name and description to another text and localize it (guide for localization here, remember to add "default_locale" : "en" to your manifest!), or just leave the plain text without localization. Change the icon's name to point to our image and edit the material tags if you want (in this case, we changed 'wood' for 'stone').
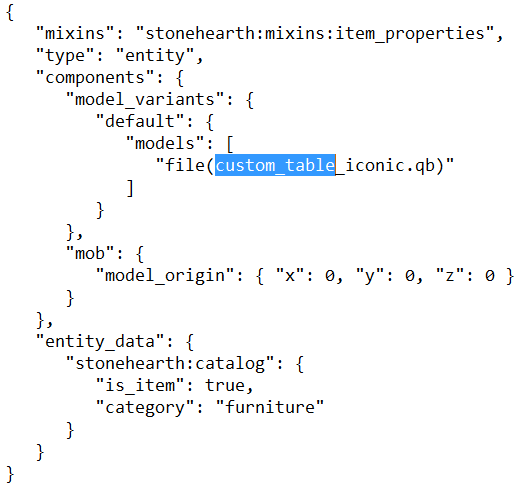
Finally, open the custom_table_iconic.json file, and adjust the values like explained above.
Open your mod's manifest. If the "aliases" section doesn't exist on it, add it (add commas when necessary). Inside the "aliases" section, let's add an alias for our new item. Again, to be on the safe side to prevent typos, we'll only use lowercase, numbers and underscore. For organizing better the aliases, we can use colons (":").
So in this case, the startermod_basic's manifest after adding our new alias will look like this:
{
   "info" : {
      "name" : "startermod_basic",
      "namespace": "startermod_basic",
      "version" : 3
   },
   "aliases" : {
      "sample_object" : "file(entities/sample_object/sample_object.json)",
      "piggy_bank"    : "file(entities/piggy_bank/piggy_bank.json)",
      "furniture:custom_table":"file(entities/furniture/custom_table/custom_table.json)"
   },
   "mixintos" : {
      "stonehearth/jobs/carpenter/recipes/recipes.json" : "file(recipes/recipes.json)"
   }
}
Double check your files to make sure the references to paths are correct (see this for how to work with absolute/relative paths in stonehearth files). Also, to make sure we don't have any missing or extra commas, let's check our JSON files in JSONLint.
Open the game, make sure your mod / the startermod_basic mod is enabled, as well as the debugtools mod.
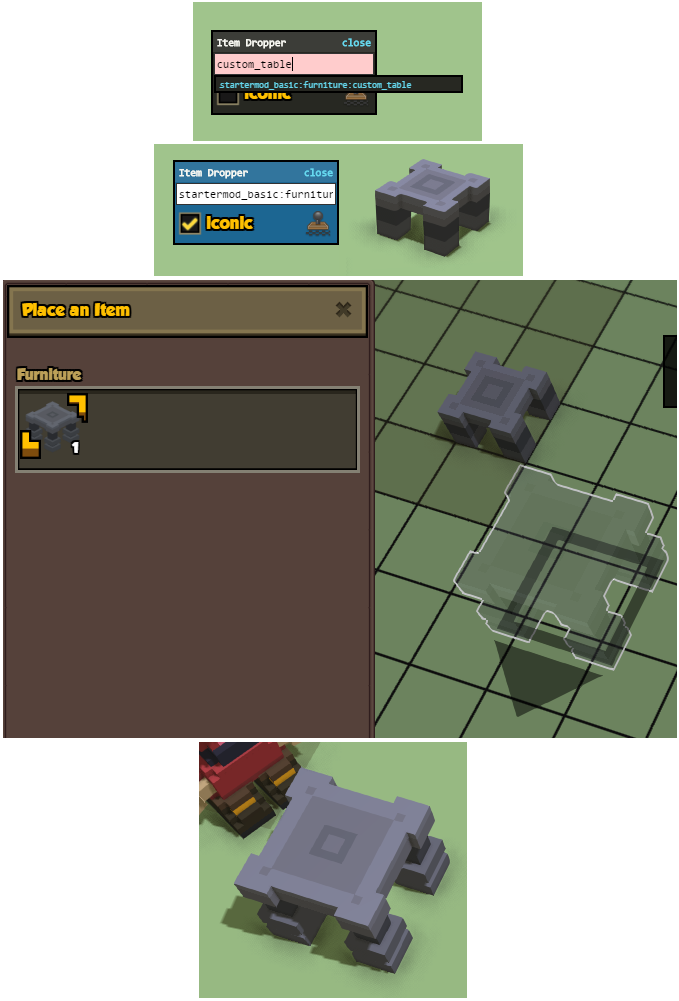
Start a new game or load a savefile. Use the item stamper, write custom_table and press enter or click on the item in the dropdown to select it.
Check the "iconic" checkbox, click on the stamp tool and click on the terrain to spawn it. Right-click to exit the item stamper.
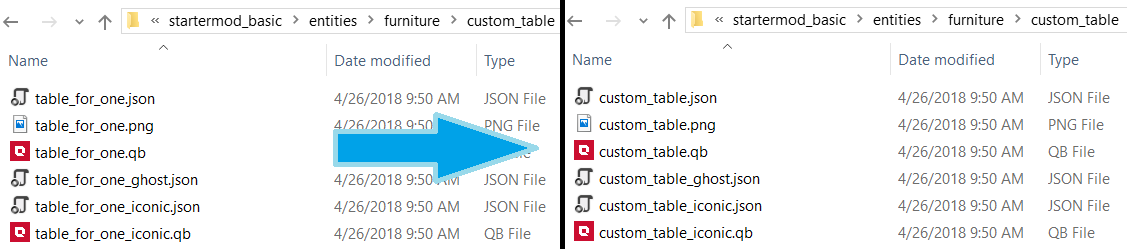
Click on the spawned item to verify the name and description.
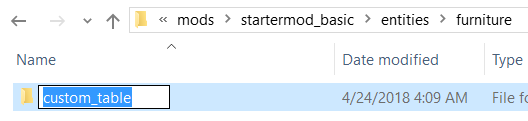
Order to place it somewhere to verify it looks correct in the 3 entity forms (you might need to create a stockpile first and wait for the item to be restocked, in order for the placement menu to detect it).